Thread a 4-Thread Serger in 10 Minutes (Color-Coded Method)
Quick answer
Unplug the serger, raise the presser foot and thread in this order: upper looper, lower looper, right needle, left needle, seating each thread in its tension disc. Use four thread colors so problems are easy to spot, then sew a thread chain and a test seam. Ten minutes is a realistic target after a few practice runs; to change colors, tie new thread onto old and pull it through.
We may earn a commission from links on this page, at no extra cost to you. Disclosure
See the course & price →$67 one-time · 60-day money-back guarantee · Paid link
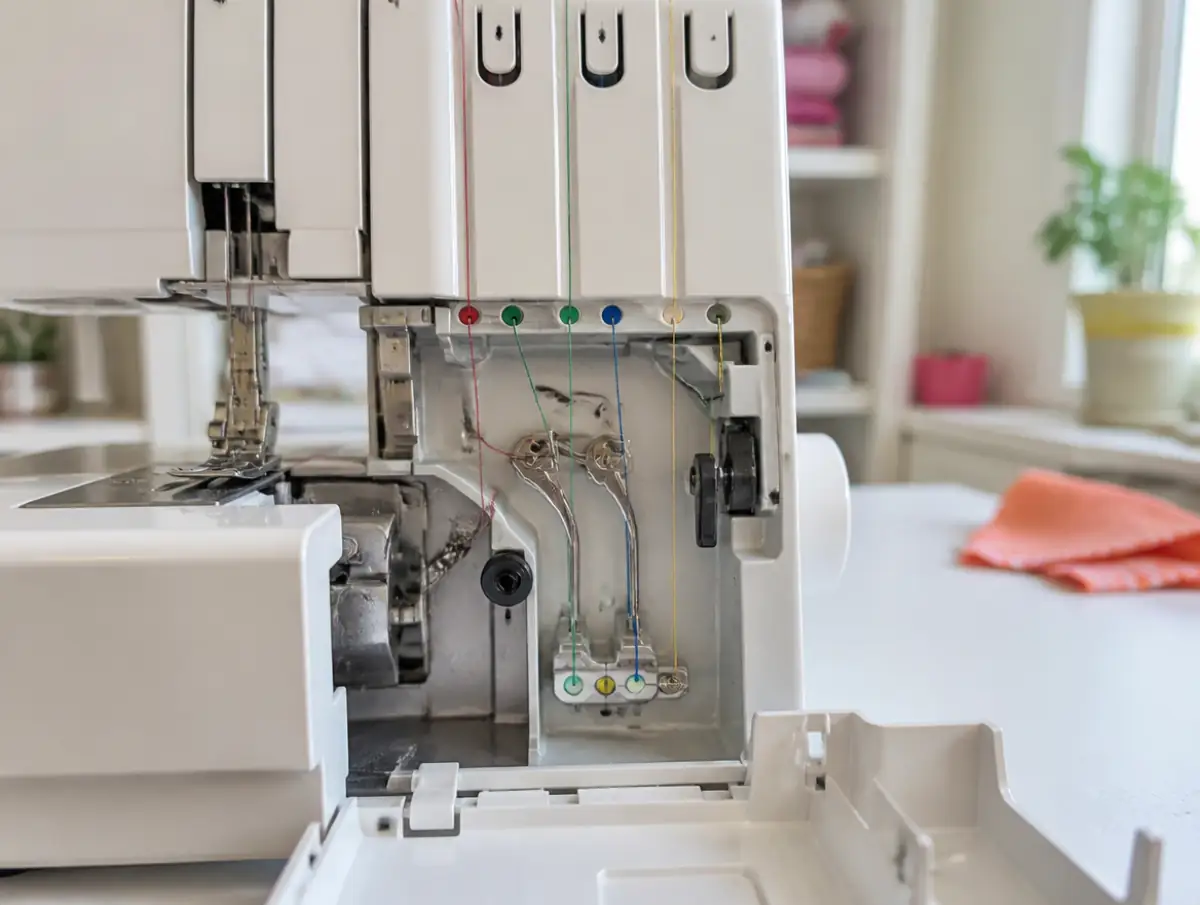
Threading a 4-thread serger looks intimidating because there are four paths, two of them hidden behind a cover. With the right order and four different thread colors, it becomes a routine job. Ten minutes is a good target once you have done it a few times; the first attempts usually take longer, and that is normal. This free guide covers the order, each path, the tie-on method for changing thread, and the mistakes that cause most problems.
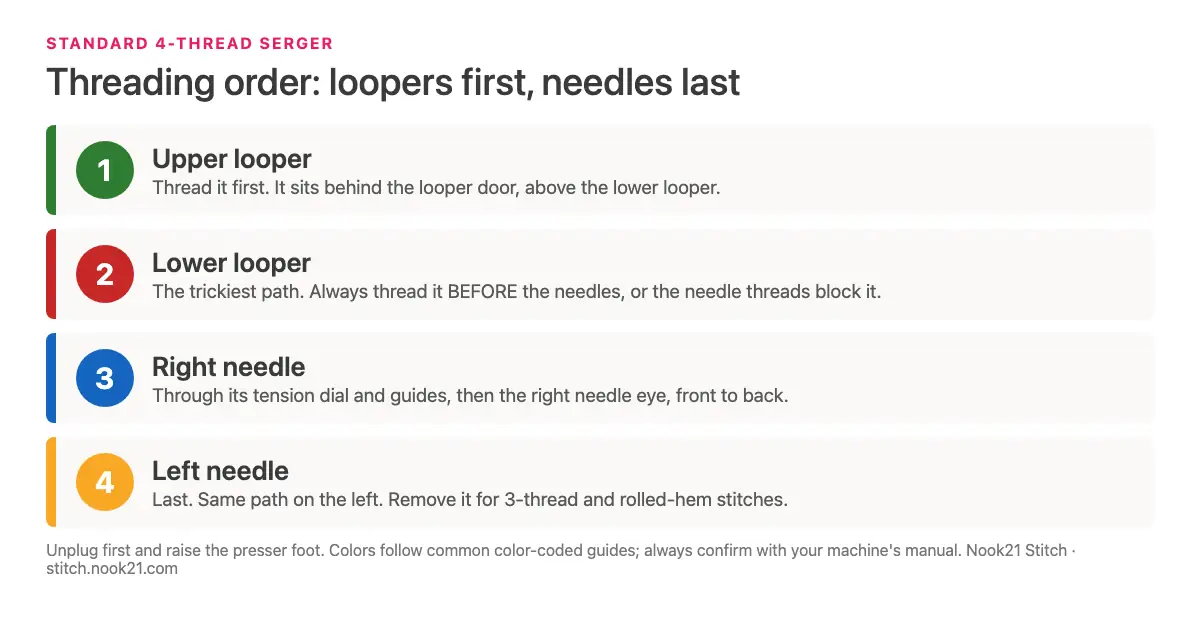
The threading order in one line
Thread a 4-thread serger in this order: upper looper, lower looper, right needle, left needle, with the presser foot raised.
The loopers go first because the needle threads must lock over the looper threads to form the stitch. If a looper thread breaks later, unthread the needles and rethread them after the looper.
This is the standard order on most home sergers. A few machines use a different sequence, so check your manual's diagram and the color-coded guides on the machine itself.
Before you start: safety and setup (minute 0 to 1)
Unplug the serger before you thread it; the knife is sharp and needles move fast.
- Unplug the machine, or at least switch it off, before opening covers.
- Raise the presser foot. This opens the tension discs so thread can seat between them.
- Turn the handwheel toward you until the needles are at their highest point.
- Extend the thread stand (the telescoping antenna) all the way up.
- Use four colors. Match the cones to the color dots on your machine if it has them.
- Have tweezers ready, plus your manual open to the threading diagram.
| Step | Thread | Target time | Key check |
|---|---|---|---|
| 0 | Setup | 1 min | Unplugged, foot up, antenna up |
| 1 | Upper looper | 2 min | Thread seated in its tension disc |
| 2 | Lower looper | 3 min | Every guide in order, out through the eye |
| 3 | Right needle | 1.5 min | Front to back through the eye |
| 4 | Left needle | 1.5 min | Front to back through the eye |
| 5 | Thread chain | 1 min | A neat chain forms |
Times are a target for practice, not a promise. Older machines with tight looper paths may take longer.
Step 1: Upper looper (about 2 minutes)
Start with the upper looper: from the cone, through the antenna guide, into its tension disc, then down the color-coded path to the looper eye.
Hold the thread with both hands and "floss" it into the tension disc so it clicks in between the plates. A thread resting on top of the disc has no tension and will loop or break later.
Follow each guide on the inside of the cover in order. Push the thread through the upper looper eye, usually from front to back, and pull a few inches through. Lay the tail toward the back of the machine.

Step 2: Lower looper (about 3 minutes)
The lower looper is the hardest path on most sergers, so take it slowly and turn the handwheel to bring the looper into easy reach.
Seat the thread in the lower looper tension disc first. Then follow the guides, which often run deep inside the machine. Many models have a lever or a swing-out guide that moves the looper eye forward for threading; check your manual.
Use tweezers to pass the thread through the final guides and the looper eye. Before you close up, make sure the lower looper thread is not wrapped around the upper looper. Pull a few inches through and lay it to the back.
Prefer to watch it done? Love Your Serger teaches regular threading plus a "knot method," then 22 stitch types. $67 one-time (checked Oct 14, 2026).
Watch the course preview →Paid link · opens the course's sales page.

Steps 3 and 4: Right needle, then left needle (about 3 minutes)
Thread the right needle first, then the left, each through its own tension disc and guides, and through the needle eye from front to back.
The right needle forms the inner line of the seam; the left needle sets the wider seam. Seat each thread firmly in its disc, then follow the guides down to the needle bar. A needle threader or tweezers makes the eye much easier.
Pull all four threads under the presser foot and toward the back, leaving tails of about 4 inches.

Step 5: Sew a thread chain and a test seam (about 1 minute)
Close the covers, lower the presser foot, plug in, and sew slowly without fabric until a 3 to 4 inch thread chain forms.
Hold the tails lightly toward the back for the first few stitches. If no chain forms, one thread is usually out of its disc or out of order; rethread that path.
Then sew a test seam on a cotton scrap. On the finished edge you should see each color in its place. If one color loops, that thread is the one to check. Our serger tension guide explains which dial to turn.

The tie-on method: change thread without rethreading
To change thread colors on a serger that is already threaded, tie each new thread onto the old one and pull it through. It is much faster than threading from scratch.
- Cut each old thread just above its cone, near the spool pin.
- Put the new cones on and tie each new thread to its old one with a small, tight knot. Trim the tails short.
- Raise the presser foot, or set the tension dials to their loosest, so the knots can pass the discs.
- Pull the looper threads through gently, one at a time, until the new color comes out past the looper eyes.
- For the needles, pull the knot to just before the needle eye. Cut it off and thread the eye by hand; a knot will not fit through.
- Reset your tension dials, then sew a thread chain and a test seam.
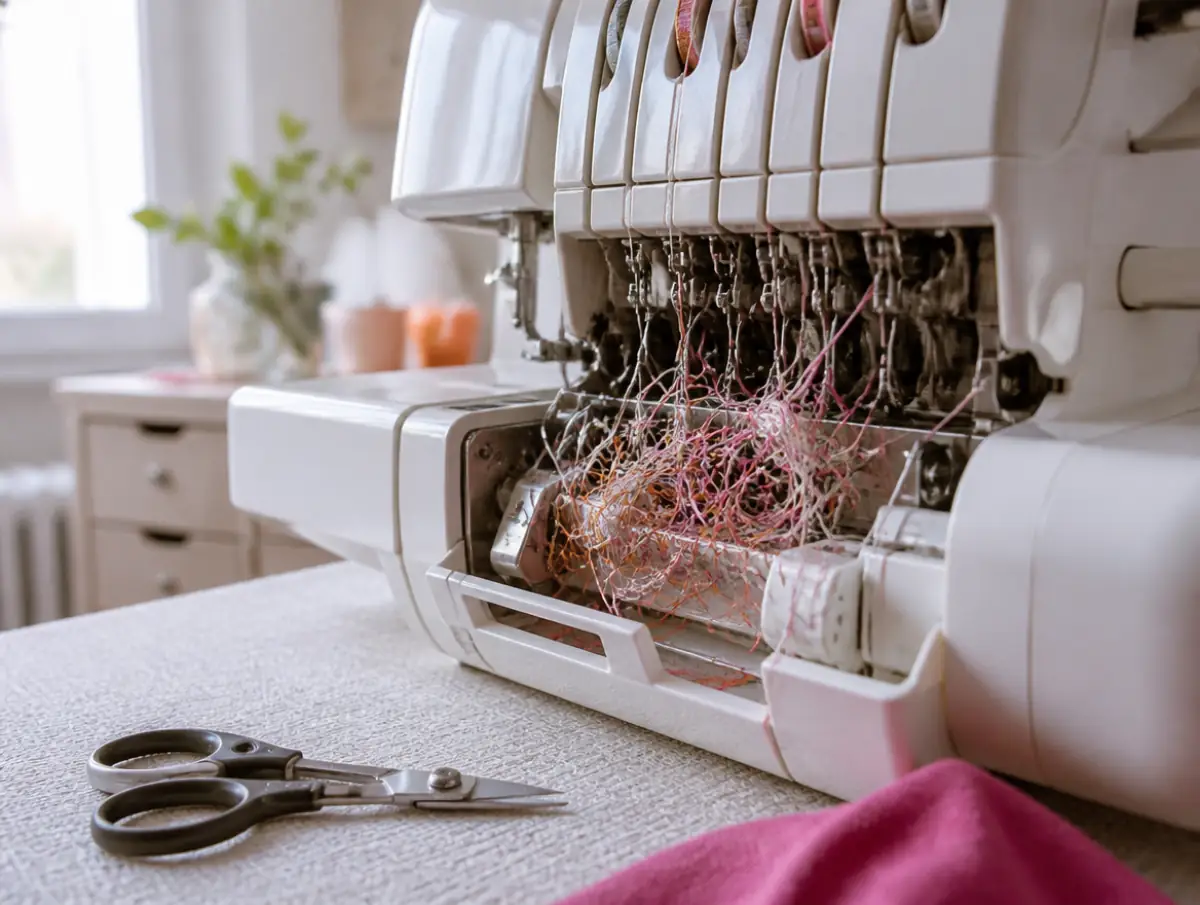
Common threading mistakes and fixes
Most threading failures come from a few repeat mistakes, and each one has a quick fix.
- Thread out of its tension disc: floss it back in with the presser foot up.
- Wrong order: pull the needle threads, check the loopers, rethread needles last.
- Lower looper wrapped around the upper looper: unthread the lower looper and run it again.
- Antenna not fully extended: raise it; low guides make thread snag.
- Thread catching on the cone notch: turn the notch down or use a spool cap.
- Bent or loose needle: replace it and push it fully up into the clamp.
Your manual still has the final say
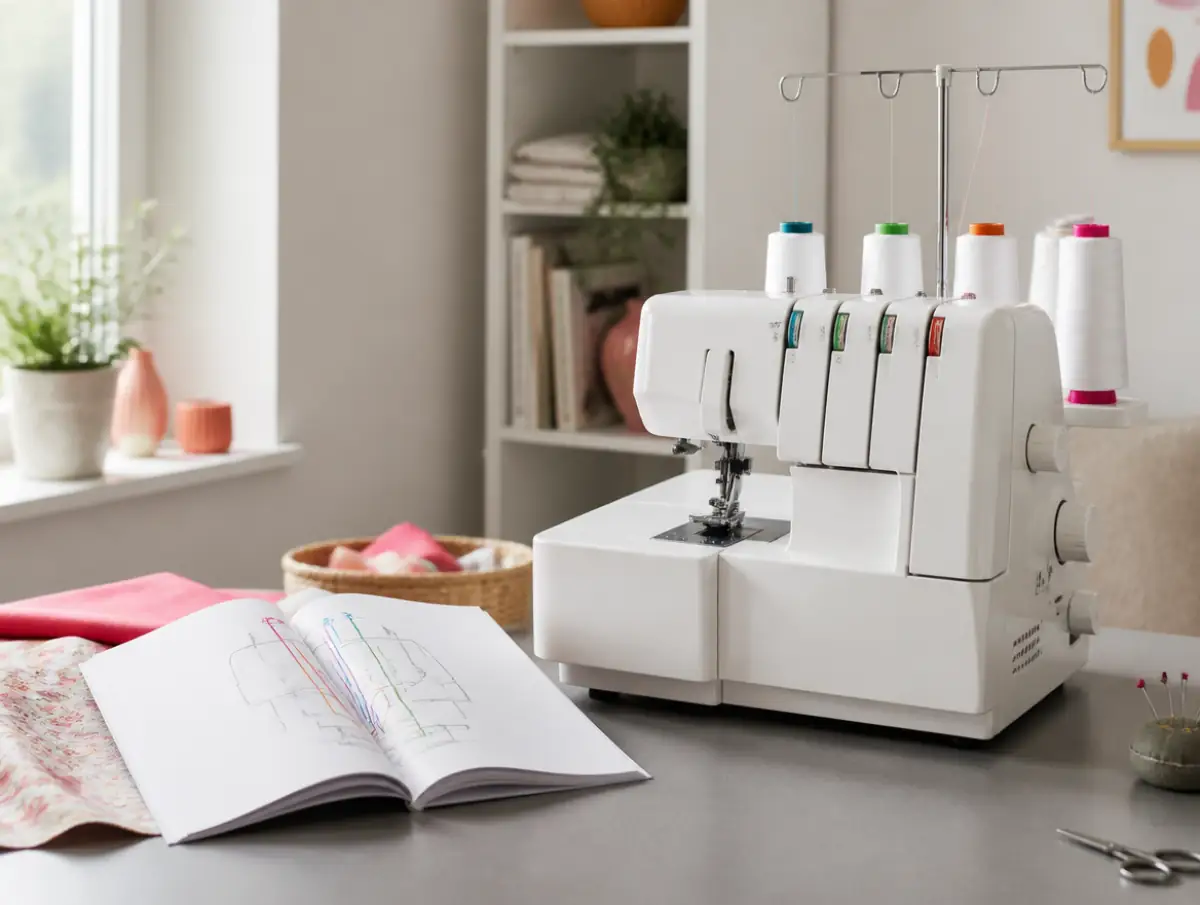
Use this order as the principle and your manual's diagram as the exact path for your model.
Brands place guides differently. Some sergers have a lower looper threading lever; others use air threading for the loopers. If your manual and this page disagree, follow the manual. For model notes and more photos, see the full how to thread a serger guide.
Repeat the full thread-up two or three times in one session. Speed comes from repetition, not from rushing.
Threading is step one. The course then covers tension, differential feed, troubleshooting and 22 stitch types.
See all 22 stitches →Paid link · opens the course's sales page.
After threading: what to learn next
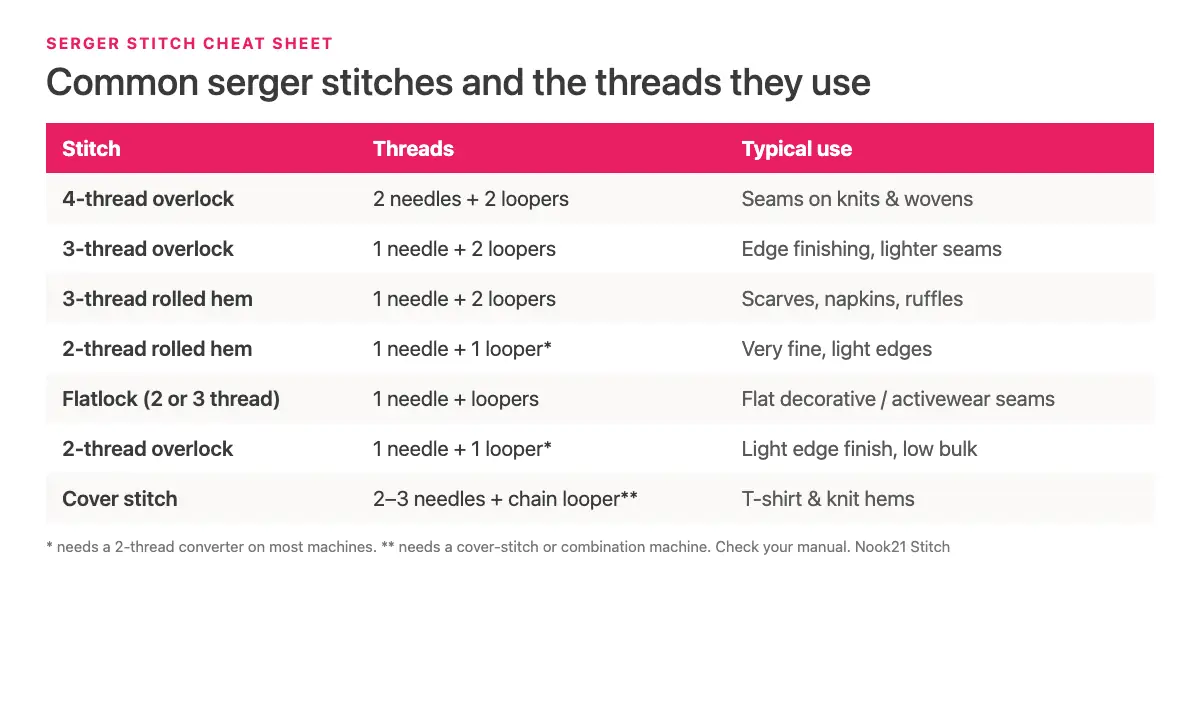
Once threading feels routine, learn one stitch at a time: 3-thread overlock, rolled hem, then flatlock.
A 3-thread overlock uses one needle instead of two, so you remove one needle thread. A rolled hem usually means removing the left needle, disengaging the stitch finger and tightening the lower looper. Differential feed above 1.0 helps knits stay flat.
Which stitches your machine can make depends on the model. 2-thread stitches need a 2-thread converter, and cover stitch needs a cover-stitch-capable machine.

For all 22 stitches: Love Your Serger
Love Your Serger is an online video course that starts with threading and moves through 22 stitch types, techniques and two projects.
It cost $67 one-time (checked Oct 14, 2026), or 3 monthly payments of $24, with lifetime access and a 60-day money-back guarantee. According to the vendor, it has about 41 to 44 videos and 4.5 to 6 hours of video, and works with any serger model.
Honest limits: no live feedback, not model-specific, and some stitches depend on your machine. See the full review, the best online serger courses, or why sergers end up in the closet.
From threading to rolled hems, flatlock and picot, one lesson at a time. Research-based pick, not a hands-on test.
Start the course →Paid link · opens the course's sales page.
Frequently asked questions
What order do you thread a 4-thread serger?
Upper looper, lower looper, right needle, left needle, with the presser foot raised so the tension discs open. A few models differ, so confirm with your manual.
Why do you thread the loopers before the needles?
The needle threads must lock over the looper threads to form the stitch. If a looper thread breaks, unthread the needles and rethread them after the looper.
How long does it take to thread a serger?
Ten minutes is a good target once you have practiced a few times. First attempts, older machines and tight lower looper paths usually take longer.
What is the tie-on method?
Cut the old threads near the cones, tie the new threads on with small tight knots, loosen tension or raise the presser foot, and pull the looper threads through. For needles, cut the knot off before the eye and thread it by hand.
Why won't my serger form a thread chain?
Usually one thread is out of its tension disc or threaded in the wrong order. Rethread that path, with the presser foot up, and check the lower looper is not wrapped around the upper looper.
Is it safe to thread a serger while it is plugged in?
Unplug it or switch it off first. The knife is sharp and the needles move fast.

More from the blog

Best 5 Online Serger Courses in 2026
Love Your Serger, Serger Made Simple, Craftsy, Tilly and the Buttons and Butchers Sew Shop compared on price, refund, stitches and access. Oct 14, 2026.
Is Love Your Serger Worth It? An Honest Look at Price and Fit
Is Love Your Serger worth $67? Price math, what's inside, objections, machine fit, the coverstitch caveat, the 60-day refund and who should skip it.
Love Your Serger vs Serger Made Simple: Which Serger Course?
Love Your Serger ($67, 60-day refund, 22 stitches) vs Ageberry's Serger Made Simple ($97, 30-day refund, 60+ videos). Prices checked Oct 14, 2026.